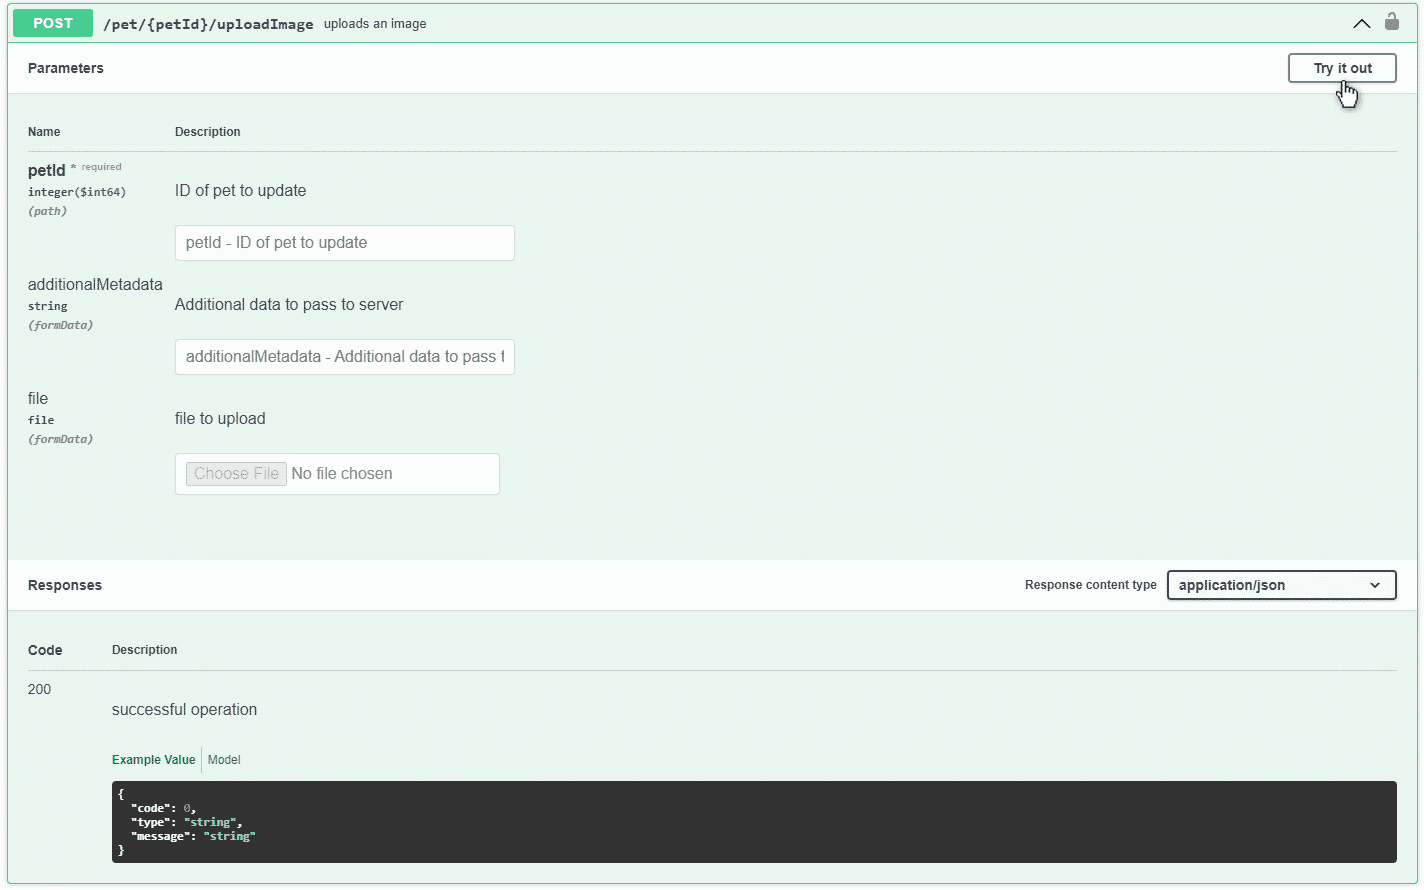
When creating software documentation, the key to help end-users understand and effectively integrate to your application is by writing api documentation in a clear manner. Swagger is one of the most popular tools used to design, build, document, and use RESTful web services. Swagger includes automated documentation, code generation, and test-case generation, with dynamic “Try it out” functionality. Many of our users have existing API documentation in Swagger that they would like to incorporate in their HTML5 output that they are generating from MadCap Flare, but the typical question is, “How?”
Well, Swagger has created a tool called “Swagger UI” that allows you to visualize and interact with an API from a web page. Swagger UI is a collection of HTML, CSS, and JavaScript files that can port your existing Swagger API documentation seamlessly into your HTML5 output, retaining formatting, as well as the ability to test API calls. The best thing about Swagger UI is that it is quite simple to implement, with only a few steps to get you up and running.
In this blog post, we’ll walk you through the process.
Download Swagger UI
There are a few options to download and implement Swagger UI, including NPM, unpkg, and Docker. The easiest, and most commonly used method to implement Swagger UI is the “Plain old HTML/CSS/JS (Standalone)” method. This method includes all the HTML, CSS, and JS files needed to run SwaggerUI in an HTML5 output, without requiring NPM.
- Download the latest release from this link.
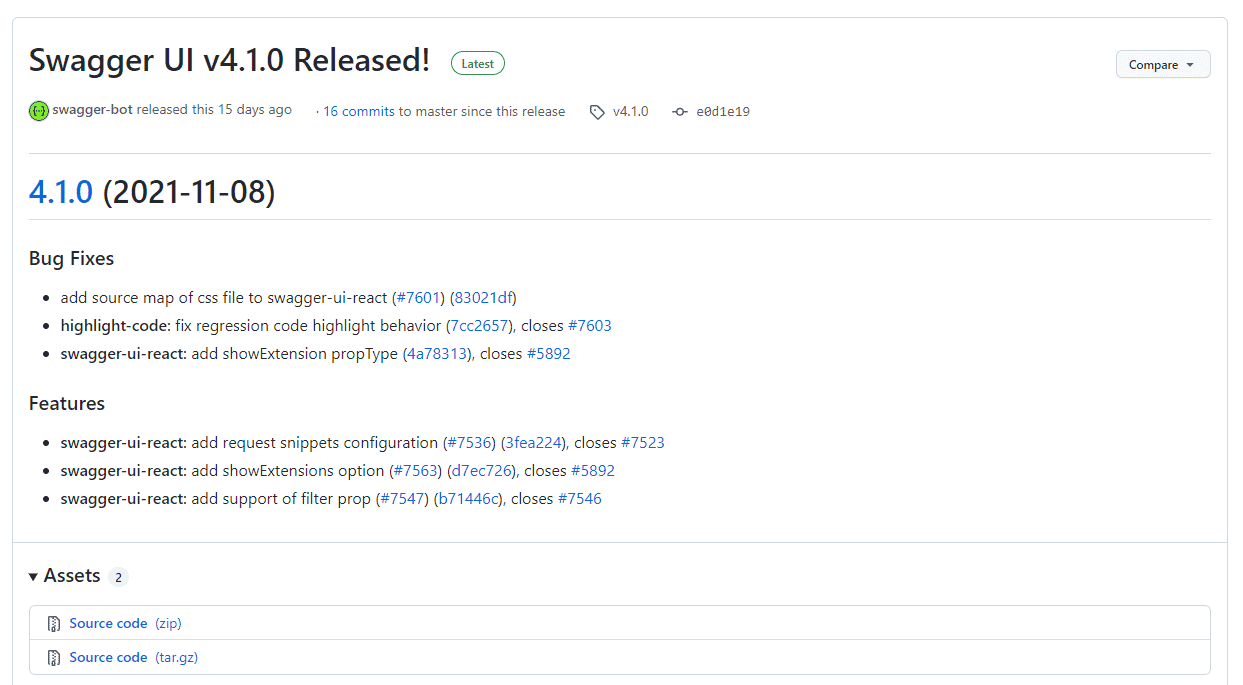
I chose “Source code (zip)” under Assets.
- Copy the /dist folder, and place it in your Flare project.
In my example, I created a “Swagger UI” folder within the Resources folder of my Flare project to house the /dist folder.
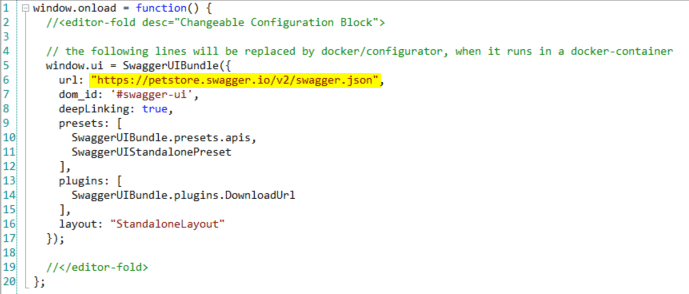
The /dist folder will have all of the assets needed to use Swagger UI in your output. - Open dist/swagger-initializer.js, and on line 6 replace "https://petstore.swagger.io/v2/swagger.json" with the URL of your hosted JSON file, wrapped in double quotes.
Local Swagger Files (Optional)
Some people would prefer to use a JSON or YAML file that is stored locally within Flare as opposed to hosting the files and referencing the URL. This way the Swagger content is built into the output, and something like latency on the server that’s hosting the Swagger content isn’t a factor.
To reference a local Swagger file follow these steps:
- Download “spec.zip” here.
- Extract spec.js and add it to your Flare project under the /dist folder.
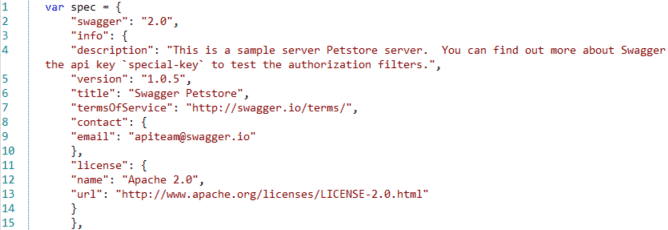
- Open spec.js in Flare and paste your Swagger JSON or YAML as the value of the spec variable.
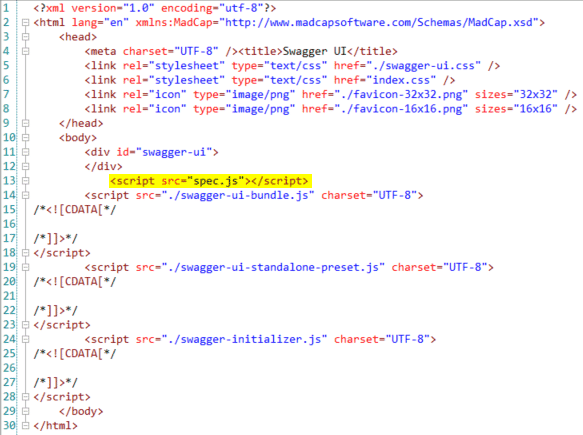
- Open dist/index.html and add a reference to spec.js inside the body of the topic.
<script src="spec.js"></script>
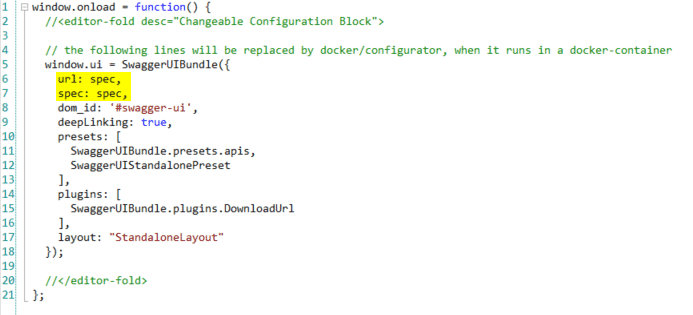
- In dist/swagger-initializer.js replace the “url” parameter with the following parameters.
url: spec,
spec: spec,
Multiple Swagger Files (Optional)
If you have multiple Swagger JSON files, you can take advantage of the urls parameter in the swagger-initializer.js file. This parameter accepts an array of API definition objects in this format:
[{url: "<url1>", name: "<name1>"},{url: "<url2>", name: "<name2>"}]
Using this setup, you can reference multiple hosted Swagger API definitions and give them custom names. In the Swagger UI output, these API definitions will appear in a picker in the top bar, allowing users to switch between them easily.
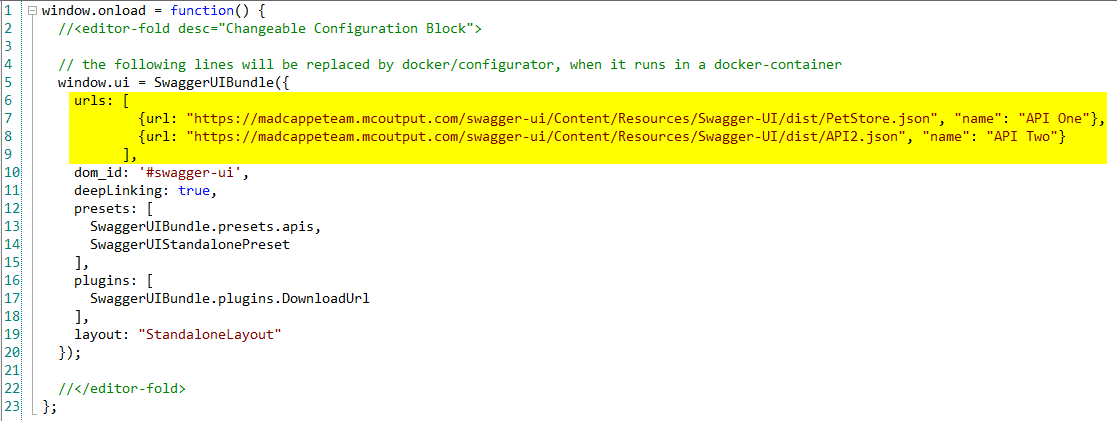
In my example, I’ve included the JSON files in my Flare project, and I’m hosting the output in MadCap Central. In this case, I could simply reference the URL of the JSON files that are included in my output.

Add Swagger UI to your HTML5 Output
Now that we have implemented Swagger UI in our Flare project, let’s reference the index.html to include it in our output!
You have options for how you would like to reference this file. You could insert a hyperlink or cross-reference to the index.html file from one of your topics that is included in your TOC. Another option would be to create a TOC entry that links to the index.html file, so your API documentation can be selected from the navigation bar.
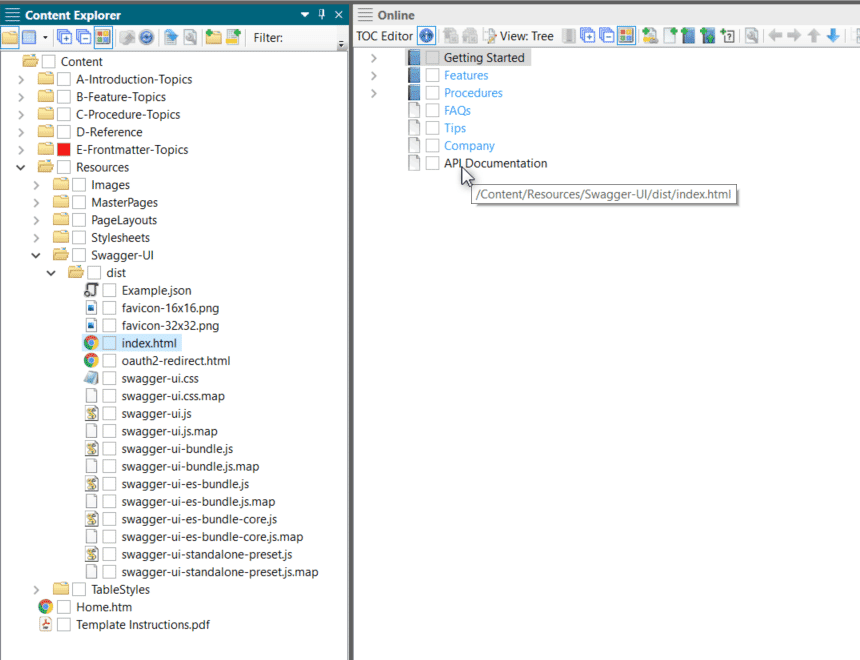
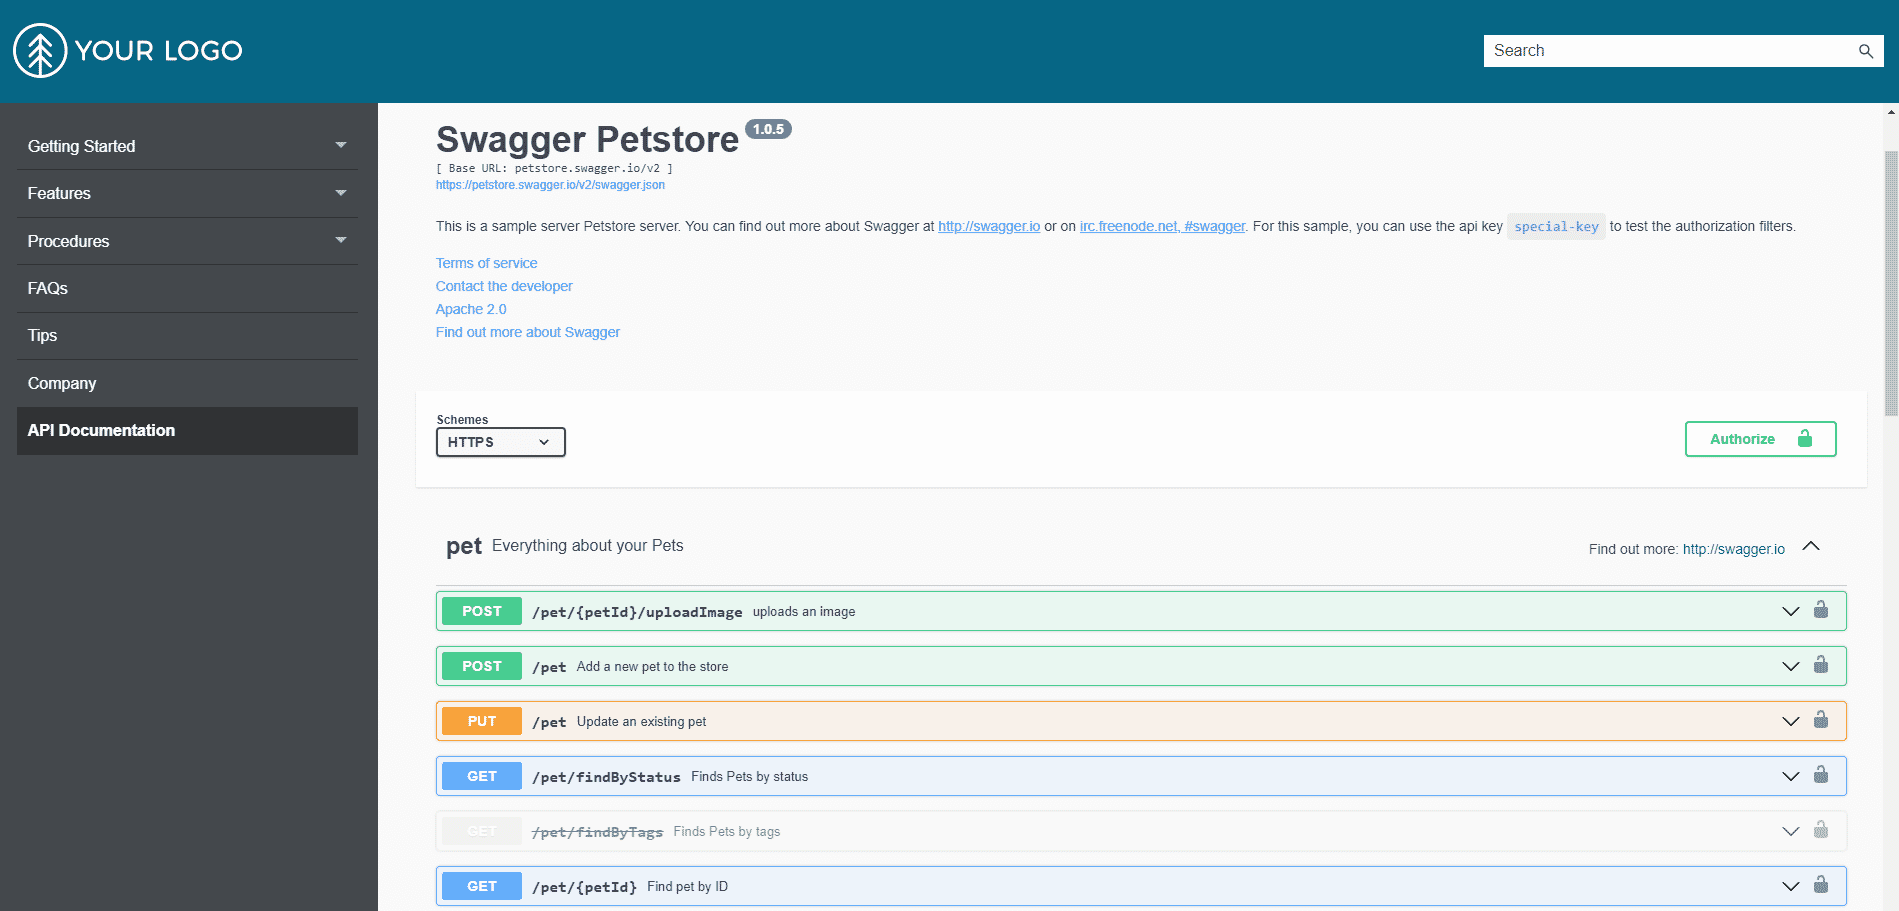
Once you have referenced the index.html file, you can build your HTML5 output to see your Swagger API documentation living alongside your docs, complete with dynamic “Try it out” functionality!
We hope you find this tip helpful! If you have any API documentation tips you would like to share or have any questions about integrating Swagger into your HTML5 outputs, drop us a line below.